A step-by-step guide to building upper-body strength and achieving your first push-up
Have you ever walked into a group fitness class or personal training session and thought, “Please please please don’t let there be push-ups today”?
If the idea of a set of push-ups fills you with dread, you’re not alone. Push-ups are tough! They’re a skill exercise, meaning they require upper body strength, trunk stability, range of motion, and even mobility… all at once. Just being strong or fit isn’t enough — it takes time and practice to master the technique.
As such, many women avoid push-ups. Maybe they’ve always struggled to do them, or they just don’t think they’re strong enough (or they’ve internalized the incredibly frustrating misconception that women can’t do standard push-ups, and should stick with push-ups off their knees instead!).
But the truth is, with proper form and some practice, almost anyone can master the push-up.
In this article, I’m going to show you how to build the strength and skill you need to do push-ups, step by step. In addition to discovering all of the benefits of push-ups, you’ll learn:
- How to align your body properly during your push-up practice.
- Four exercises that will help you progress to full push-ups.
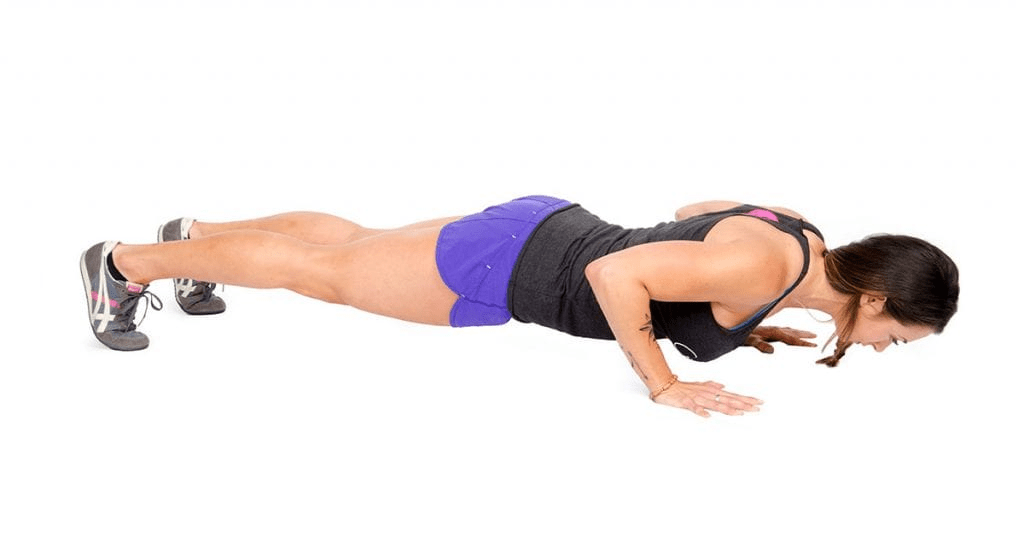
- Exactly how to perform a full push-up.
Plus, I’ve included a 12-week training program that shows you exactly how to program these four exercises so you can achieve your push-up goal!
What Are the Benefits of Push-Ups?
The push-up is an effective bodyweight exercise whether your goal is getting stronger, building muscle, or improving overall fitness. A horizontal pressing exercise, push-ups primarily work the chest (pectorals), triceps, deltoids, and core, but require some assistance from the glutes and leg muscles, too.
Learning to perform push-ups creates a unique opportunity for you to:
- Build your upper body strength. This will carry over to other exercises, such as bench presses and burpees. Plus, daily tasks — like moving furniture, pushing heavy doors, and getting up from the ground — will become easier and safer.
- Improve your cardiovascular health. Push-ups engage several large muscle groups at once, forcing your heart to work harder to pump blood to those tissues.
- Increase shoulder strength and stability, which can help reduce shoulder pain and risk of injury. (Note: If you have shoulder pain or an existing shoulder injury, push-ups could be painful and even make things worse. Speak with your doctor or physiotherapist before you practice these push-up progressions.)
- Exercise anywhere. Whether you’re short on time or don’t have access to a gym, add push-ups to a bodyweight circuit and you’ve got a full-body workout.
- Boost confidence. Mastering push-ups can help you feel empowered and strong, especially if it’s been on your list of fitness goals for a while.
Now you’ve seen why push-ups are a great exercise to incorporate in your training, let’s look at an important alignment tip to help you perform the standard push-up — as well as all the push-up progressions I’m going to cover shortly — safely, effectively, and with proper technique.
Alignment and the Proper Push-Up Position
Whether you’re performing a regular push-up or a modified variation, being mindful of your form and alignment is important.
Here’s the trick: Think of placing a broomstick down your back.
As you get into your starting position and then perform your push-up, that imaginary broomstick should maintain contact with your body in three places:
- The back of your head
- Your upper back
- Your tailbone
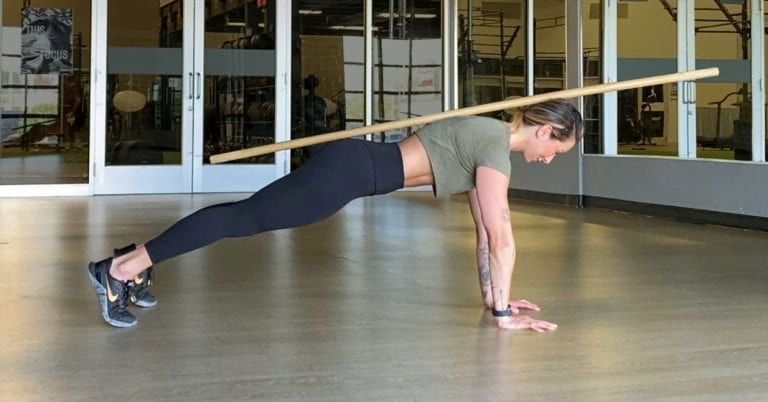
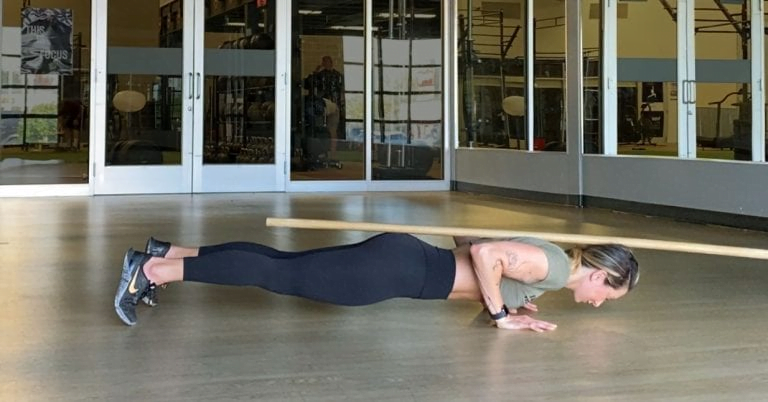
Maintaining a straight line with your body — and engaging your entire core throughout the rep — will allow you to move smoothly as one solid unit, which can help your push-up (or push-up variation) feel less challenging and protect your lower back.
Quick tip: Some folks find it helpful to video themselves from the side so they can check their alignment and make any necessary adjustments.
Keep your imaginary broomstick in mind as you work on each of the following push-up progressions.
4 Progressions to Help You Achieve Your First Full Push-Up
The key to learning push-ups is to break the movement down into small, doable exercises. As you practice these progressions, you’re developing the strength and skill required to be able to perform the full push-up.
Depending on your fitness level, you can work these progressions into your training one of two ways:
- Work on one progression at a time. Once you’ve mastered one, move to the next, and so on.
- Work on two progressions at a time and increase the difficulty as you get stronger. (Don’t worry, we’ll give you a more detailed week-by-week training guide at the end of the article.)
If you’re tacking these progressions onto a workout (rather than practicing them as standalone movements outside of your training sessions), you may find it helpful to do push-up work right after your warm-up so you’re not fatigued. Either way, always be sure to thoroughly warm up first.
A final quick note before we get started: You’ll notice that push-ups from the knees, otherwise known as short-lever push-ups, are not one of the progression exercises. Short-lever push-ups are an amazing exercise to target your pecs, deltoids, and triceps. However, they’re often not the most effective way to progress to a full “long-lever” push-up (on the toes with legs extended). This is because bringing your knees to the ground significantly shortens the lever, requiring far less upper body and core strength, which are two things that need to be developed in order to perform long-lever push-ups. Additionally, an important part of push-up practice is patterning the movement properly, which is precisely what you’ll be doing by working on variations that are also performed on your toes.
Progression #1: High Plank Hold
The high plank hold is incredibly important to practice when working toward a push-up, yet it’s almost always overlooked. It might help to think of the high plank hold as the foundation of the movement, as it’s the starting point (and ending point!) of each push-up. Plus you’ll get the added benefit of strengthening your core while you’re at it.
How to Perform a High Plank Hold
- Get into a high plank position on the ground by pressing evenly into the floor through your palms and each of your fingers until your arms are fully extended. Extend your legs out behind you with your knees off the floor and toes tucked under.
- Put a slight bend in your elbows. They should point about 30–45º out from your body.
- Slightly tuck your chin so your neck is in a neutral position.
- Create a straight line with your body by using the broomstick tip.
- Lightly engage through your core and glutes.
- Hold this position for 5–15 seconds (that’s one rep). Release by dropping your knees to the floor.
- Reset your starting position, and repeat.
- Perform 3–4 sets of 3–5 reps. Rest 1–2 minutes between sets.
If a high plank hold on the ground is too challenging, feel free to place your hands on something elevated, such as a bench or a countertop. Place your hands as high as needed until you’re able to perform several reps while maintaining proper alignment.
Continue reading: https://www.girlsgonestrong.com/blog/strength-training/strength-gain/push-up-progressions-for-beginners/